When you purchase through links on our site, we may earn an affiliate commission.
Introduction
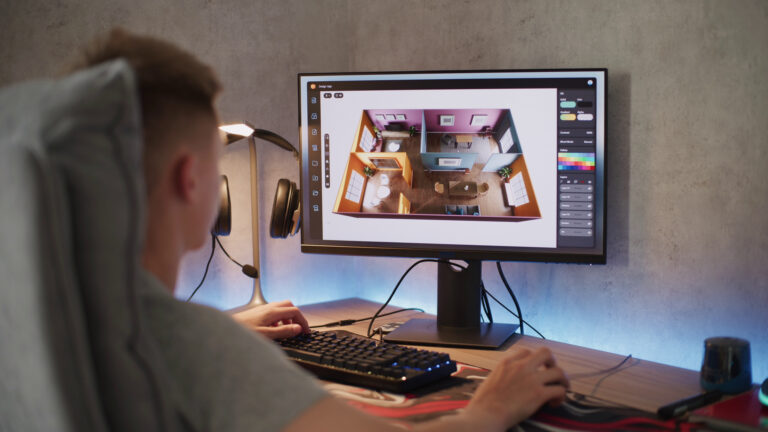
Dreaming of chart‑worthy audio without renting expensive studio time? A budget home recording studio lets you capture crystal‑clear vocals, podcasts, and voice‑overs right in your bedroom for less than one month’s rent. In this step‑by‑step guide, you’ll see how a single USB mic, a pair of reliable headphones, free software like Audacity and a few DIY acoustic tweaks turn any small space into a money‑making production hub. You’ll also find internal tips that connect to our guides on earning money with your voice and creating faceless YouTube voice‑overs. Ready to hit record? Let’s dive in.
Map Your Space Before Spending
A budget home recording studio starts with the room you already have. Get this right and even a $60 mic will sound like it cost hundreds.
- Listen for noise first
- At night, turn off every appliance and record 30 seconds of silence on your phone. Hum from air‑con or traffic means you should pick another corner or hang thick blankets to dampen it.
- Moving blankets or old duvets hung on cheap curtain rods slash reflections for under $40.
- Follow the acoustic triangle
- Place your desk against the shortest wall. Sit so sound hits an absorber behind you, not a bare wall.
- A thick rug beneath your chair eats floor reflections and helps the room “dry up.”
- Use vertical space
- Bookcases loaded with uneven items act as free diffusers.
- Clip a lightweight boom arm to your desk; raising the mic off the surface cuts keyboard thumps.
Dial in the room first and your future gear upgrades will shine.
Essential Gear Under $500
Building a budget home recording studio does not mean settling for crackly audio. These four items nail pro clarity while staying under the $500 ceiling.
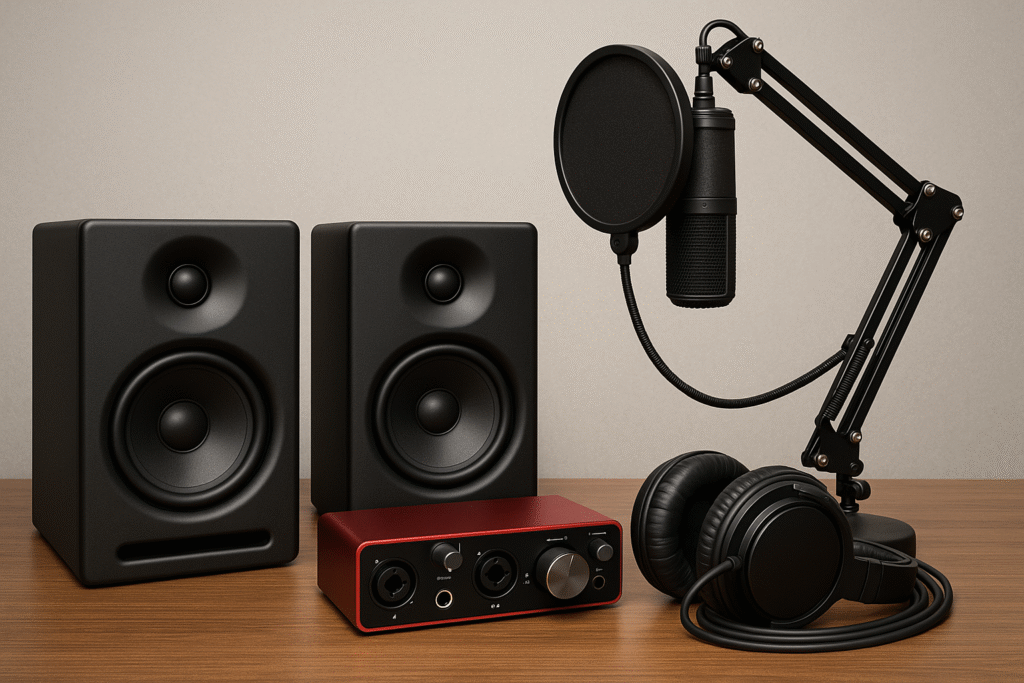
- USB condenser mic – Audio‑Technica AT2020USB+
- Clean, neutral tone and a built‑in headphone jack for latency‑free monitoring.
- Usually hovers around $149 on Amazon (Amazon) – drop an affiliate link here when you publish.
- Audio interface upgrade path – Focusrite Scarlett Solo Studio bundle
- If you want XLR later, this bundle adds a mic, headphones, and the renowned Scarlett Solo interface for about $239 at Sweetwater (Sweetwater).
- Interfaces future‑proof you if you plan to record multiple sources.
- Closed‑back headphones – Sony MDR‑7506
- Legendary for accurate monitoring and priced around $100. They stop bleed into the mic and show you exactly what listeners will hear.
- Pop filter & boom arm combo
- A $20 mesh screen blocks plosives, while an adjustable arm lets you position the mic an inch off‑axis from your mouth. Tiny tweaks like this cut mouth noises in half.
Pro tip: spend 70 percent of your budget on capture—mic, interface, and headphones—because you can’t “fix” bad recordings in software.
Next up, we’ll treat the room on a shoestring and set you up with free software that rivals big‑ticket DAWs. Let me know when you’re ready to move on!

Acoustic Treatment on a Shoestring
Treating reflections is the cheapest way to make your budget home recording studio sound like a pro booth.
- Target the first reflections
- Sit where you plan to record, clap once, and listen for a quick flutter echo. That’s the wall to treat first.
- Peel‑and‑stick acoustic foam panels cost about $15 for a 12‑pack—plenty for a small corner.
- Tame the low end
- Bass collects in corners. Shove rolled‑up rockwool in big trash bags, wrap in fabric, and stuff each corner top‑to‑bottom. DIY costs under $40 and rivals commercial bass traps. A full tutorial is on the Acoustics Forum .
- Kill floor bounce
- A thick rug or old duvet under your desk absorbs slap from hardwood floors.
- Test, tweak, repeat
- After each addition, record 30 seconds of silence and watch the waveform in Audacity. The flatter the line, the quieter your noise floor.
Internal tip: once reflections are under control, you’ll spend less time editing breaths—saving hours when producing content for faceless YouTube voice‑overs.

Free and Low‑Cost Software Stack
Hardware captures the sound, but software sculpts it. Good news: your budget home recording studio can run entirely on free tools until you’re ready to upgrade.
- Audacity(free, Windows/Mac/Linux)
- Perfect for recording, basic editing, and noise reduction. Download direct from AudacityTeam.org to avoid adware.
- Reaper(discounted licence $60)
- When multitracking becomes a must, Reaper unlocks unlimited tracks, MIDI, and powerful plug‑ins while still living on a tiny CPU footprint. Free, fully‑featured trial for 60 days.
- Must‑have free plug‑ins
- TDR Nova dynamic EQ for surgical tone shaping.
- TDR Kotelnikov for transparent compression that keeps narration natural.
- ReaPlugs VST suite (even if you don’t buy Reaper) adds gates and limiters.
- Quick mix workflow
- Cut unwanted silence and breaths.
- Roll off lows below 80 Hz with a high‑pass filter.
- Apply gentle compression (2:1 ratio) so peaks stay controlled.
- Normalize to ‑1 dB and export a 24‑bit WAV ready for distribution or monetization in your next earn‑money‑with‑your‑voice project.
With these tools installed, you’ve got the same sonic toolkit used in commercial studios—without the four‑figure invoice. Ready for final setup steps and a sound‑check routine? Give me the word, and we’ll wrap up Sections E and the conclusion.

Step By Step Setup & Sound Check
Follow this quick routine to lock in pro quality every time you power up your budget home recording studio:
- Desk and mic placement
- Position your mic arm so the capsule sits just off to the side of your mouth at eye level. This angle cuts harsh “P” pops without a bulky shield in front of your face.
- Set input gain
- Speak in your loudest voice and dial the interface or USB knob until peaks touch ‑12 dBFS. A free meter like Youlean Loudness Meter gives a clear readout.
- Capture room tone
- Record 30 seconds of silence. Listen on your Sony MDR‑7506 headphones; hiss or hum means you may need to tighten a foam panel or turn off a nearby PC fan.
- Apply a gentle noise gate
- In Audacity, use the Noise Reduction effect: profile your silence, then reduce by 6 dB. Over‑processing can make vocals sound underwater, so keep it light.
- Export and cross‑check
- Bounce a 24‑bit WAV, play it on phone speakers and a cheap Bluetooth speaker. If it sounds balanced there, it will sound balanced anywhere—and you’re ready to publish to your earn‑money‑with‑your‑voice projects.
Repeat this five‑minute routine before every session and you’ll maintain consistent audio without chasing gremlins later.
Conclusion
You now have a crystal‑clear roadmap to build and run a budget home recording studio that rivals spaces costing ten times more. Plan the room, grab smart gear, treat the walls, master free software, and follow the quick sound‑check routine—your listeners will never guess you recorded next to a closet.
Put your new setup to work by creating content for faceless channels, podcasts, and voice‑over gigs that pay real money. Your next recording is only one click—and one quiet corner—away. Happy tracking!